Passing the Red Hat OpenShift Administrator (EX280) Exam – Part 1: The Non-Technical Side
- tharun-vempati
- Certifications , Dev ops , Red hat , Openshift , Administrator
- October 25, 2025
Table of Contents
Last week, I successfully passed the Red Hat OpenShift Administrator (EX280) exam — and what a journey it was!
This post is the first part of my blog series, where I’ll share not only the technical preparation but also the often-overlooked non-technical details that can completely change your exam experience.
In this post, we’ll focus on the exam environment setup and some lessons I learned the hard way, so that you don’t have to go through the same last-minute stress I did.
My Exam Day Story: A Last-Minute Rush
To be honest, I happened to read the exam instructions only on the morning of my exam day. That’s when I noticed something I initially thought was optional — an external camera requirement.
Coming from my experience with the CKA exam, where the built-in webcam was sufficient, I assumed the same would apply here. But just to be sure, I quickly reached out to a colleague who had taken EX280 before — and that’s when I got the shocker: the external camera is mandatory.
With only a few hours left before my exam, I literally rushed to a nearby computer store and bought an external webcam and a USB hub. It was a tense morning, juggling setup checks and worrying if everything would work in time.
When the exam finally started, I instantly realized why the external camera was mandatory. The proctor needs to monitor your side profile and hands on the keyboard to ensure exam integrity. Without a side-view camera, it’s impossible for them to do proper remote supervision.
In hindsight, it made perfect sense — but trust me, discovering it on exam day is not how you want to find out.
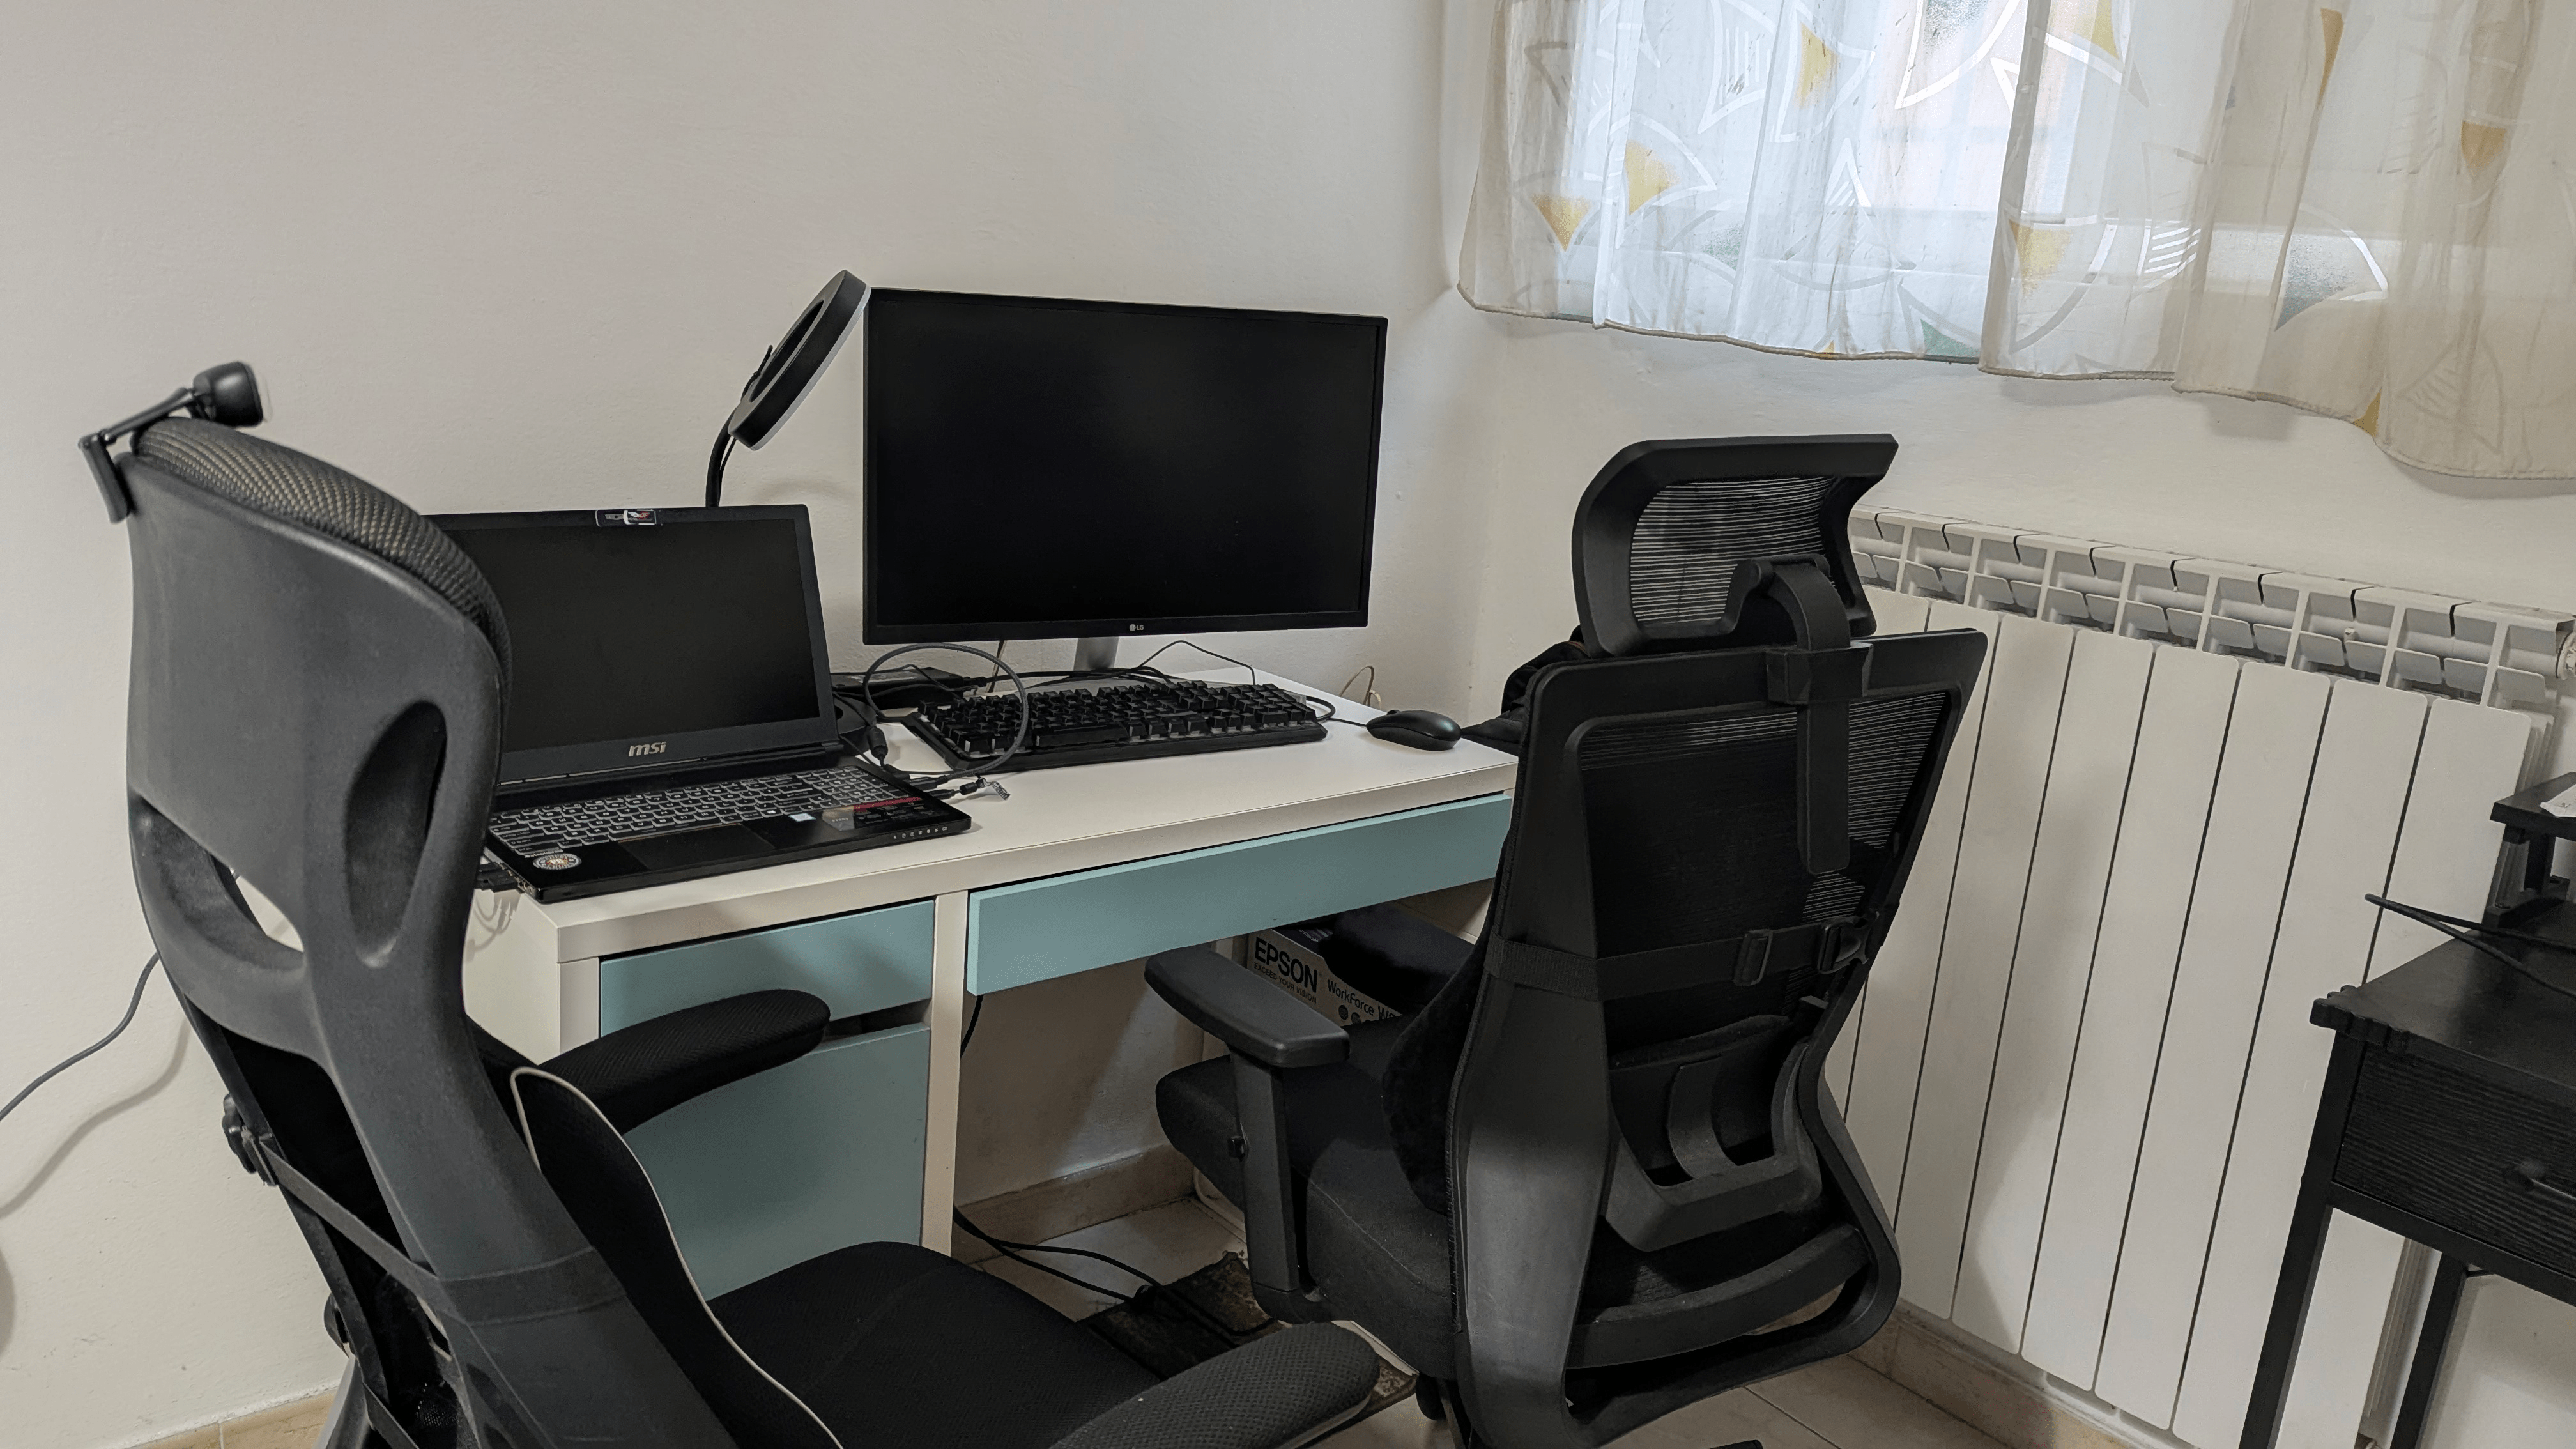
(This is the exam environment set up with camera placement that worked for me.)
Exam Environment & Setup Essentials
For anyone planning to take the Red Hat EX280 exam remotely, here’s what you’ll absolutely need:
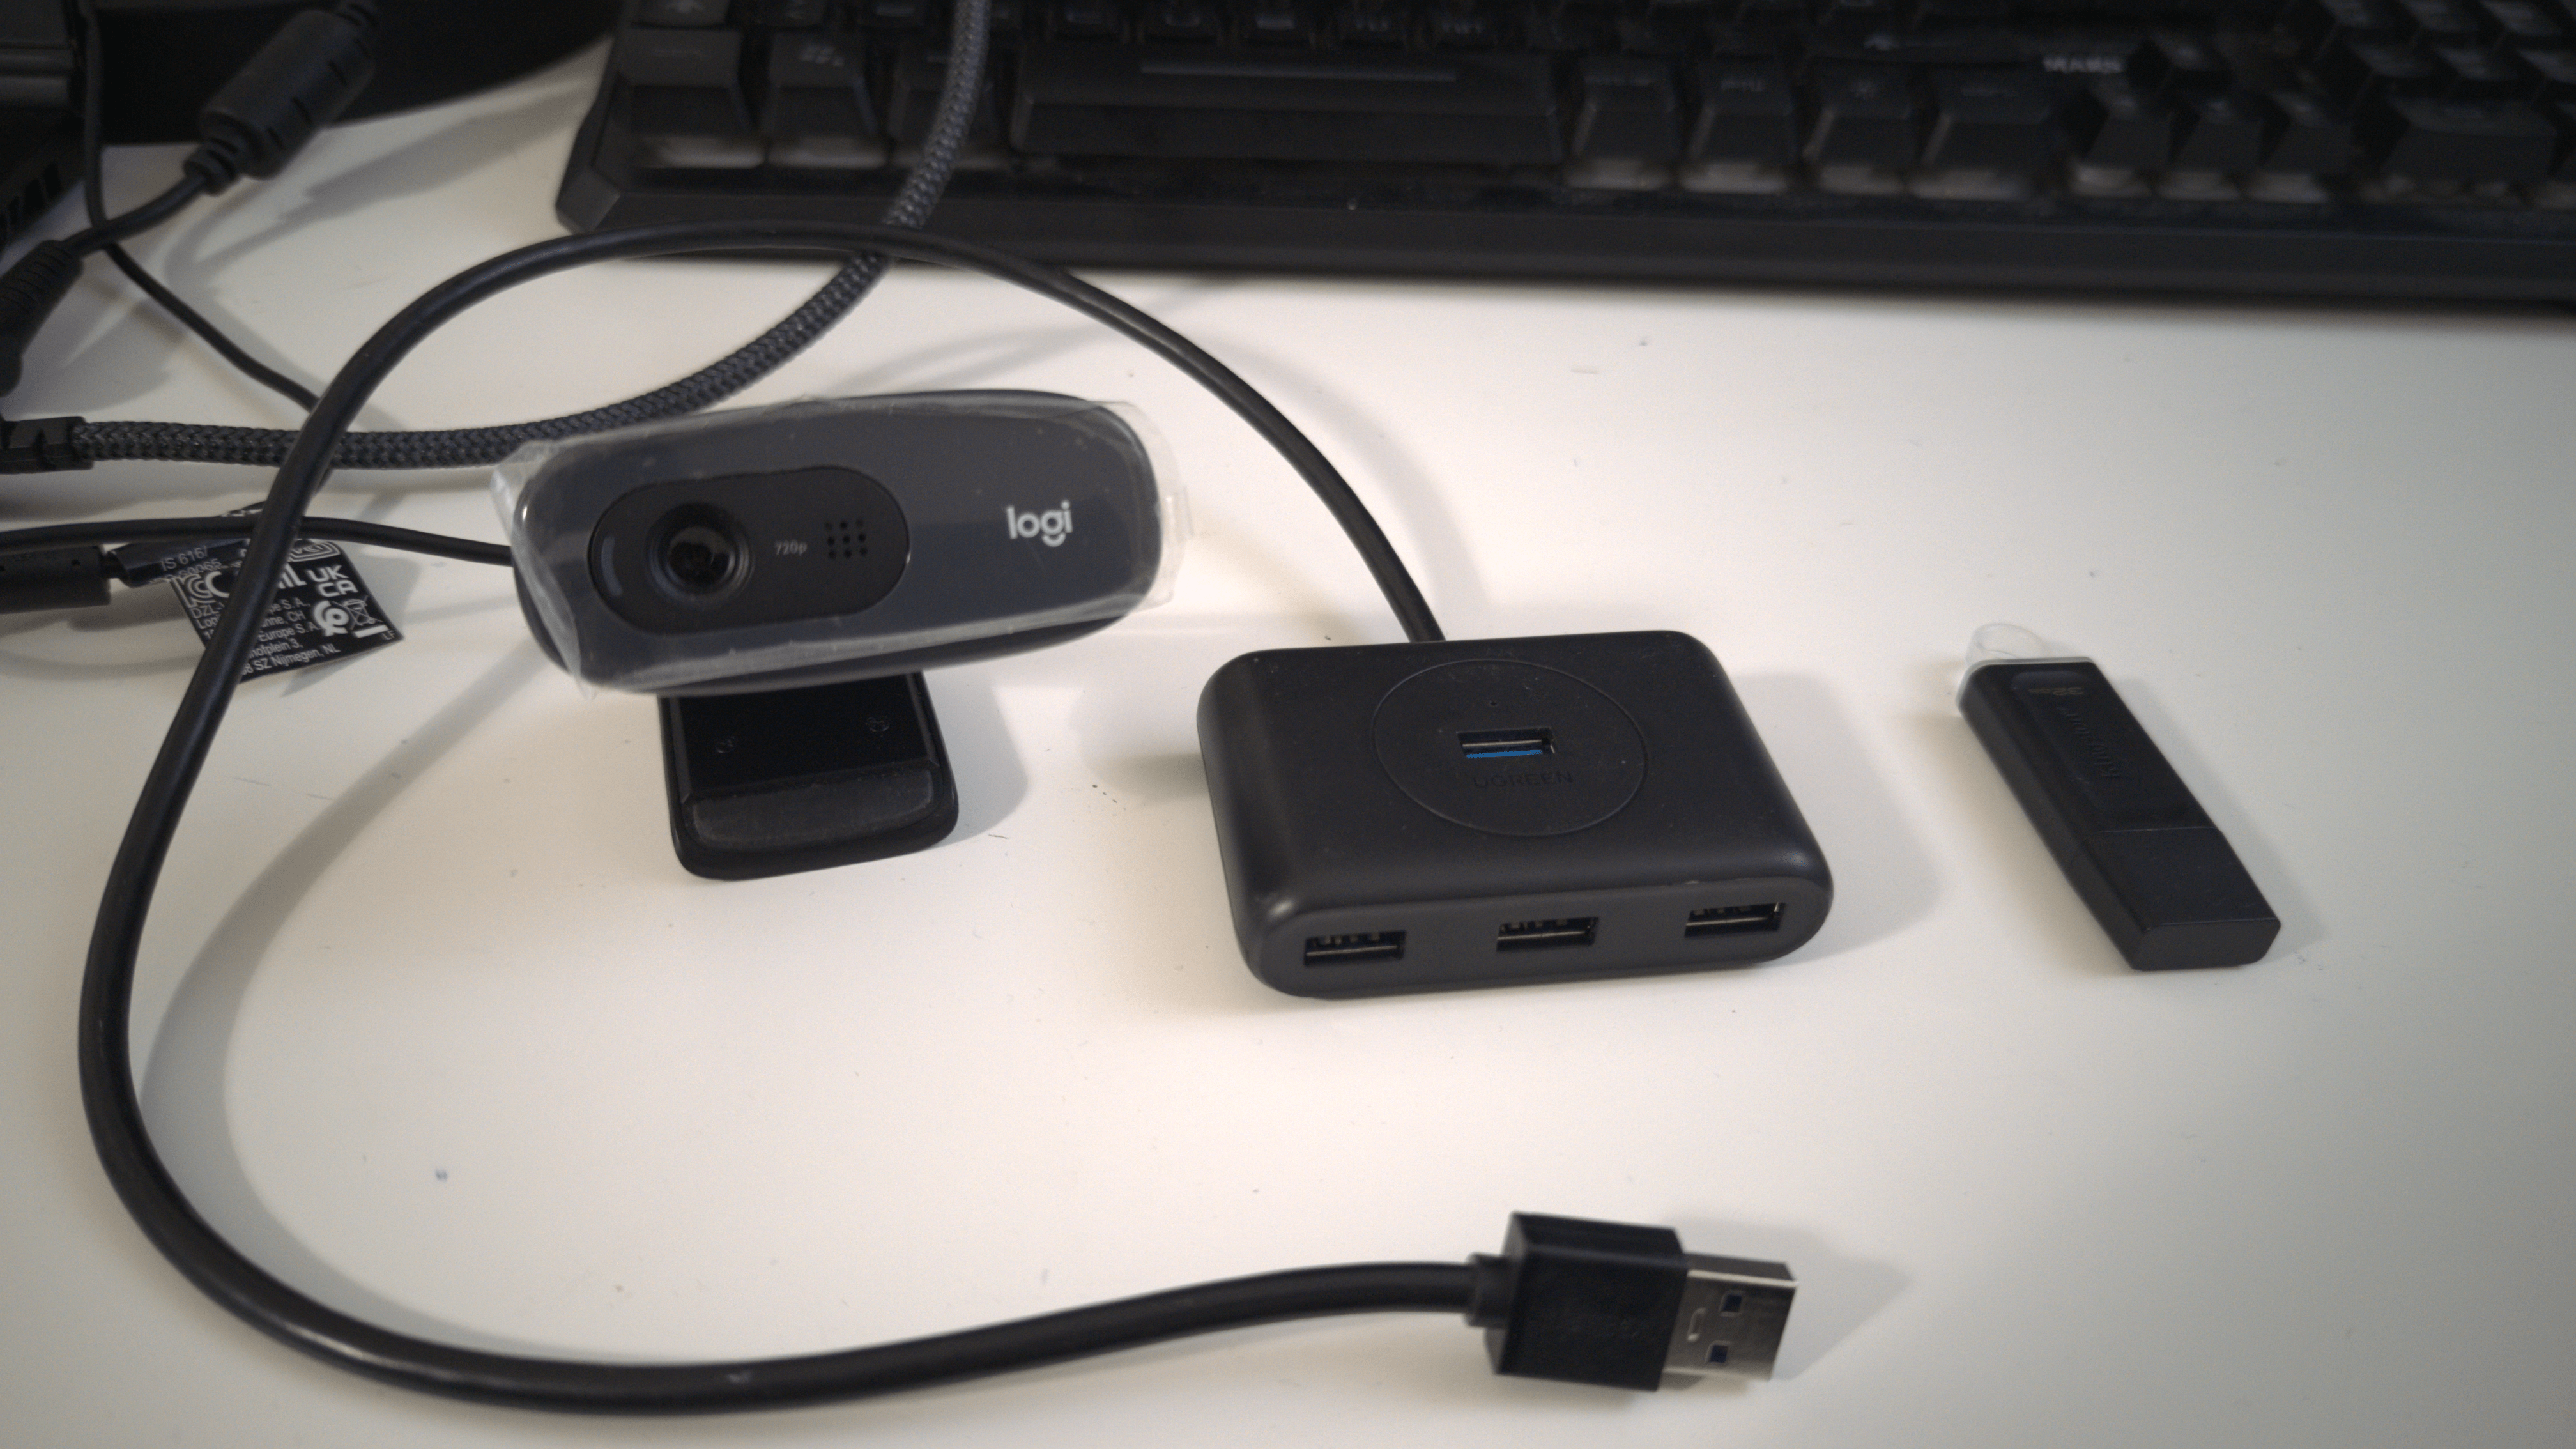
1. External Camera
Mandatory for proctoring. It must capture your face and hands from a side angle. Without it, the exam simply won’t proceed.
Tip: Test the angle in advance so your entire desk is visible comfortably.
2. USB Hub
The USB hub becomes essential because you’ll need to connect multiple devices — the bootable USB, external webcam, and possibly a wired mouse and keyboard. Without a hub, you’ll run out of ports fast.
3. 8GB (or larger) USB Drive
This is used to create the Red Hat Remote Exam bootable image. You’ll boot into this environment during the exam, so make sure it’s empty or backed up first.
(Exam Essentials.)
Check Your Laptop Compatibility
Here’s something that might surprise you — not all laptops are compatible with the Red Hat remote exam environment.
I personally faced this issue: my Lenovo laptop simply couldn’t boot the exam environment from the USB drive. After several attempts, I had to switch to another system to get it working.
So before exam day, make sure you:
- Test your hardware thoroughly using the Red Hat-provided compatibility tool.
- If possible, try booting into the exam image at least once to confirm everything loads correctly.
- Have a backup laptop or desktop ready, just in case.
Trust me, discovering that your laptop doesn’t boot the environment on the exam day is one of the worst ways to start your test. Spare yourself that panic!
The Ctrl+C / Ctrl+V Dilemma
Here’s another interesting (and frustrating) experience I had.
When the exam started, my very first task required me to copy some content from the task description into the terminal. Naturally, I did what anyone would — I pressed Ctrl+C and Ctrl+V.
The moment I did that, my screen froze completely.
Within seconds, the proctor refreshed my exam environment, and everything came back to normal. I thought it was just a one-off glitch, so I tried it again — and guess what, the same thing happened. Another refresh, another few minutes gone.
The proctor then informed me that Ctrl+C and Ctrl+V are not supported in the remote exam environment and advised me to use right-click copy and paste using the mouse instead.
I tried using the mouse method, but it felt slow and awkward at first. Thinking I could save time, I switched to typing everything manually. That decision backfired — big time. While verifying my first task, I realized I had misspelled a username, which broke authentication. I had to redo the entire task from scratch.
By the time I finally completed that single task, 45 minutes had already passed.
The lesson here?
Even if you trust your typing skills, avoid manual typing unless absolutely necessary. Use the right-click copy and paste method to reduce errors — it might be a bit slower, but it’s far safer and more reliable under exam pressure.
The Wi-Fi Connection Story — A Real Test of Patience
I gave my exam using a Wi-Fi connection. The exam duration is 3 hours, and for the first two hours, everything went perfectly fine. But then, during the last 30 minutes, things started to fall apart.
Suddenly, my system began lagging terribly — the mouse pointer moved almost two minutes after I moved it! It was one of those helpless moments where you just want to bang the table in frustration.
Thankfully, I had only two tasks left, and after a painful half-hour, the connection stabilized just enough for me to finish them.
Once done, I politely asked the proctor if he could extend the exam time by 10 minutes, just so I could verify a few tasks I wasn’t confident about. But he clearly said,
“Exam duration cannot be extended — not even by one minute — under any circumstances.”
That’s when it hit me: you must plan for disruptions. Whether it’s lag, network issues, or minor delays, you’ll have to manage within the allotted time.
So here’s my strong advice —
- If possible, use a wired connection for stability.
- If Wi-Fi is your only option, ensure it’s reliable and tested beforehand.
- And always remember: the exam clock never stops.
Tips & Tricks for a Smooth Exam Experience
Here are some practical lessons — many learned the hard way:
- Read the exam instructions well in advance. Don’t make my mistake! Know your requirements days before the exam.
- Run the compatibility test early. Red Hat provides a tool to ensure your setup meets all requirements.
- Prefer a wired connection. Wi-Fi drops can cause unnecessary panic.
- Avoid using Ctrl+C / Ctrl+V. Use right-click copy and paste or be extremely careful if typing manually.
- Set up in a quiet, well-lit room. The proctor should have a clear view of you at all times.
- Manage your time wisely. The EX280 is entirely hands-on, and every minute counts.
- Stay calm and composed. If something goes wrong, the proctors are supportive — but your mindset matters.
Tips and Tricks for the Exam Session
Once your setup is perfect and the exam begins, here are a few strategies that can really help during the actual session:
Use the console wherever possible.
For tasks like storage, health checks, and deployments, the OpenShift Web Console is often much faster and more intuitive than working solely in the terminal.Practice key OpenShift commands.
Get comfortable with commands likeoc edit,oc explain, andoc get all. They’re lifesavers when you need to move quickly or verify configurations under time pressure.Be fluent with the Vi editor.
Many tasks require quick file edits. Knowing how to navigate, edit, and save files efficiently in Vi will save precious minutes.Stay calm and be mindful of time.
It’s easy to panic when something doesn’t work immediately — but composure often leads to clarity. Keep an eye on the clock and prioritize tasks smartly.
More detailed exam-handling strategies and practical examples are coming up in Part 2 of this series!
The Motive Behind This Post
I decided to write this post right after my exam because I realized how much non-technical preparation affects your performance.
If you aren’t prepared for these setup requirements, the stress of arranging devices, hardware issues, or dealing with connectivity problems can easily overshadow the actual exam — and that’s the last thing you want on such an important day.
I hope sharing my experience helps both aspiring candidates and those who have already passed — because we all know that behind every certification success story, there’s often a bit of chaos, panic, and improvisation!
What’s Coming Next
In the next part of this series, I’ll dive into my technical preparation — the study materials, practice strategies, and key OpenShift concepts that helped me pass the EX280.
If you’re planning to take the Red Hat OpenShift Administrator exam soon, stay tuned! The next post will guide you through how to prepare effectively — minus the last-minute rush.
If you’ve taken a Red Hat exam before, I’d love to hear your own experience in the comments. Did you also have a “morning surprise,” compatibility issue, or connectivity scare like I did?